Configure WSO2 API Manager for use with the API Server
Add roles
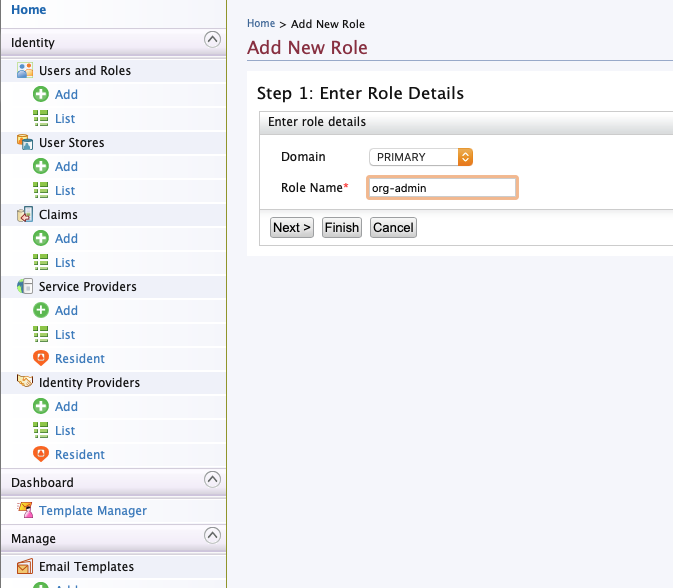
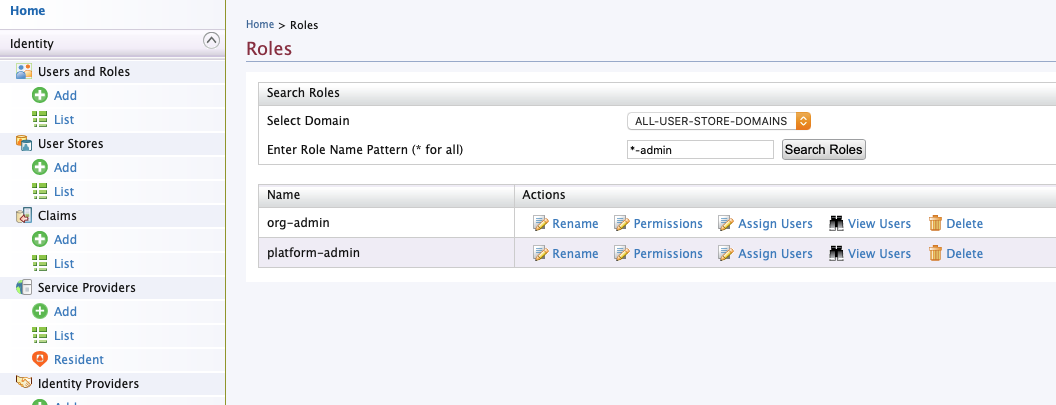
Navigate to “Users and Roles” -> “Add”. Then click “Add new role”. Add
both org-admin and platform-admin roles. 
image
image
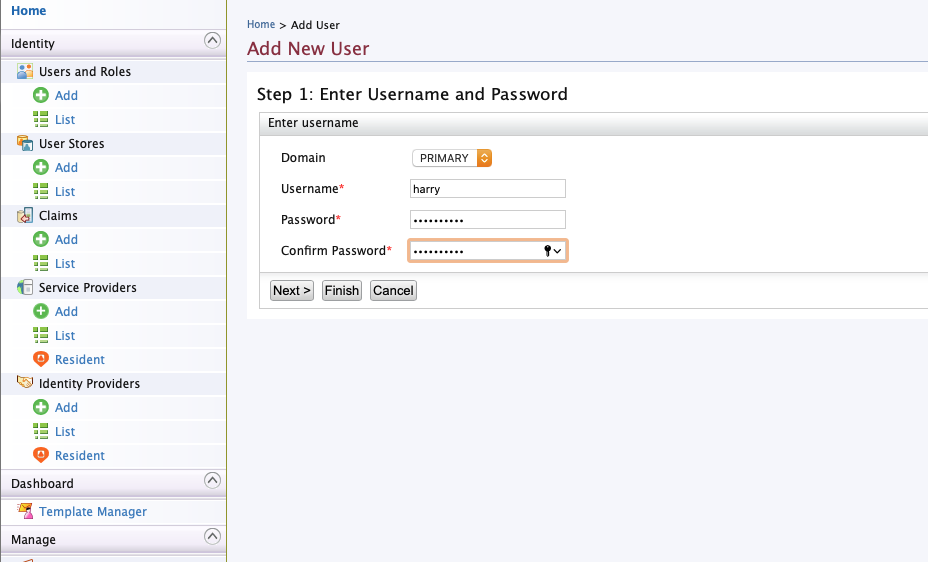
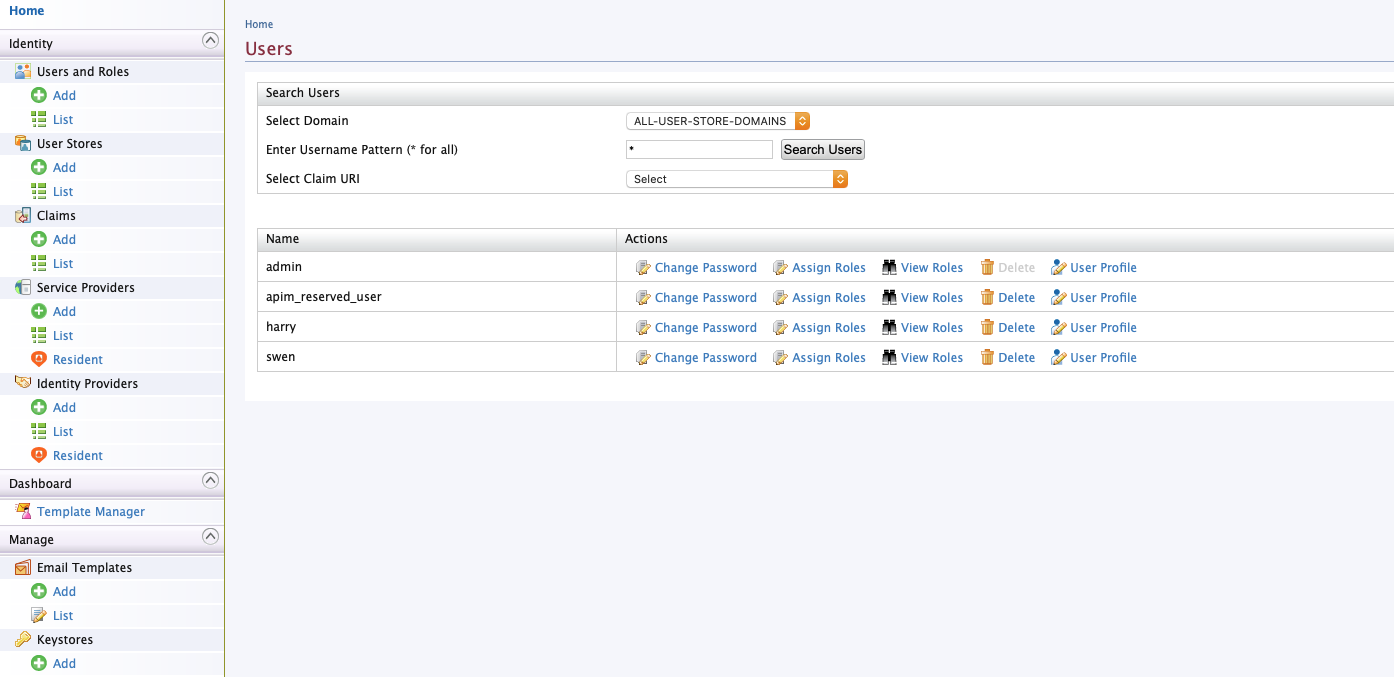
Add user
Navigate to “Users and Roles” -> “Add”. Then click “Add new user”.
image
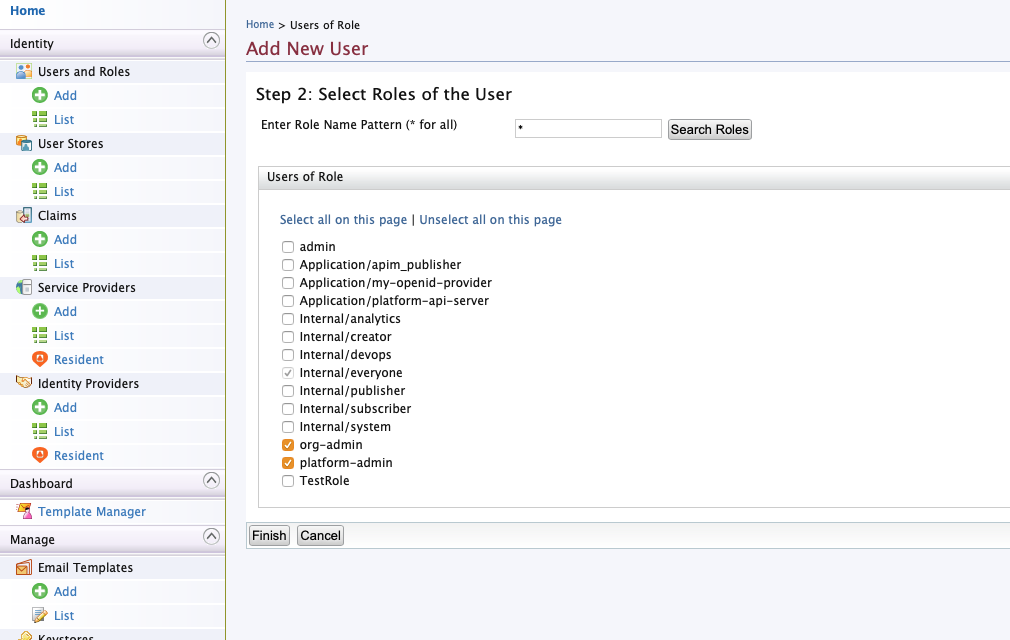
In the next step associate roles with the user as required
image
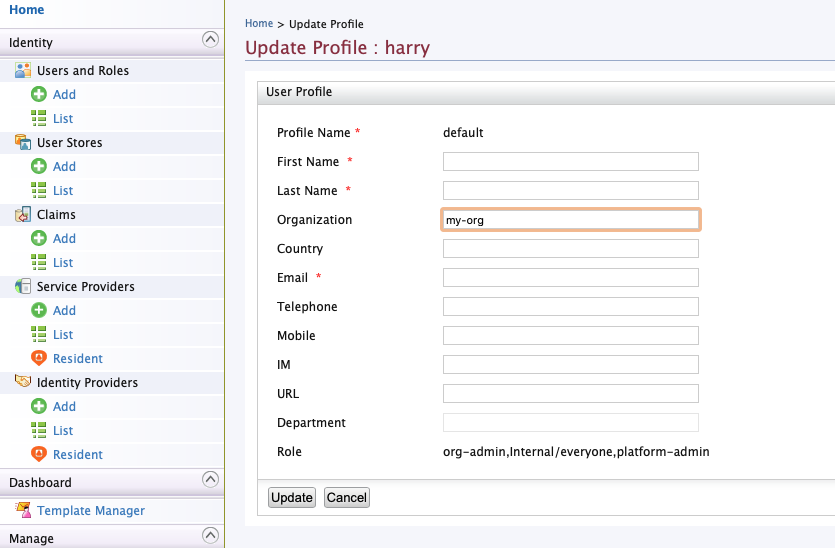
Add organization association(s)
We will use the organization attribute of the user profile to store
organization membership. The API Server expects a list of orgs separated
by space character.
Once the user is created click “User Profile” on your user’s entry in
the list and click to edit the default profile. Add e.g. “my-org” to
the organization attribute:
image
image
Configure OpenId Scope for organization
This is necessary so the organization attribute of the user profile
is included in the JWT
Navigate to “OICD Scope” -> “Add”. Set scope name to organization
and then “Add OIDC Claim”
Select organization from the drop down list then click “Finish”:

Configure Service Provider for the API Server
Navigate to “Service Provider” -> “Add”, add a name and register the
provider: 
Then edit your service provider selecting it in “Service Provider” ->
“List” 
Claim Configuration
Ensure the “Claim Configuration” looks similar: 
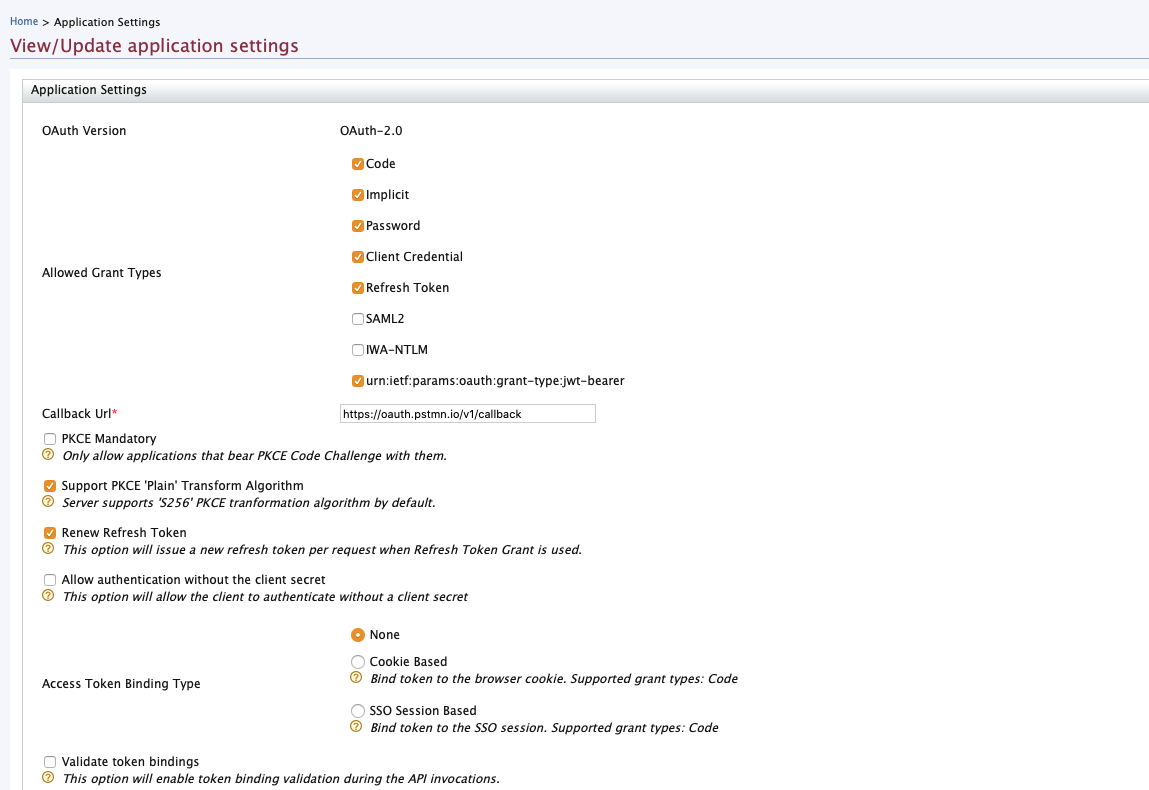
OAuth/OpenID Connect Configuration
Open the section “Inbound Authentication Configuration” sub section “OAuth/OpenID Connect Configuration” and click “Edit”:

image
Ensure you set the correct callback url. This depends on your deployment and how your client app authorizes users and obtains tokens
image
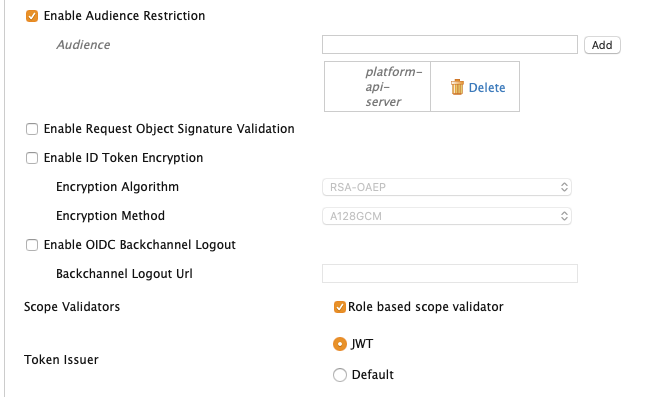
Also make sure the service provider is issuing JWT and that you add an audience claim. If disabled - enable the “Role based scope validator”
image
Obtaining a JWT Token
The tokens must be requested with the “openid” and “organization” scope. The latter is required so that the organization attribute of the user is included in the tokens.
Example JWT
The payload section of a JWT obtained from WSO2 that contains all required attributes will look similar to this:
{
  "sub": "harry",
  "aut": "APPLICATION_USER",
  "iss": "https://localhost:9443/oauth2/token",
  "groups": [
    "org-admin",
    "Internal/everyone",
    "platform-admin"
  ],
  "given_name": "Harry",
  "aud": [
    "hTa_o_7z2lBYrELD9cm3lvVK9IMa",
    "platform-api-server"
  ],
  "upn": "harry",
  "nbf": 1619702089,
  "azp": "hTa_o_7z2lBYrELD9cm3lvVK9IMa",
  "scope": "openid organization",
  "organization": "my-org",
  "exp": 1619705689,
  "iat": 1619702089,
  "family_name": "H",
  "jti": "f30911fa-6675-4f30-8d47-19fb3e791888",
  "email": "harry@email.com"
}
Configure the API Server
Properties for claim and username extraction:
AUTH_EXTRACTION_USER_PRINCIPAL=$.upn
Will evaluate to “harry” given the JWT example above.
AUTH_EXTRACTION_ORGS=$.organization
Will evaluate to
my-org
AUTH_EXTRACTION_ROLES=$.groups
Will evaluate to
[
    "org-admin",
    "Internal/everyone",
    "platform-admin"
  ]
Properties for JWT verification
AUTH_VERIFICATION_AUD=platform-api-server
Must match the aud property in the JWT token - see example above
AUTH_VERIFICATION_ISSUER=https://localhost:9443/oauth2/token
The URL of your wso2 realm.
AUTH_VERIFICATION_KEY=/home/admin/platform-api-tmp/wso2-key.pem
You can obtain the public key / cert via the JWKS endpoint (see
https://docs.wso2.com/display/IS541/JSON+Web+Key+Set+Endpoint) and you
then need to convert this to a PEM format. The JWKS URL is at
https://<IS_HOST>:<IS_HTTPS_PORT>/oauth2/jwks. Copy the key
element of the payload as below

image
To convert JWKS to PEM you can for example use this web site -
8gwifidotorg/jwkconvertfunctions.jsp. Paste the JWK key and hit
submit, then copy the resulting public key and save it to the local file
system - in the example above it was saved to
/home/admin/platform-api-tmp/wso2-key.pem
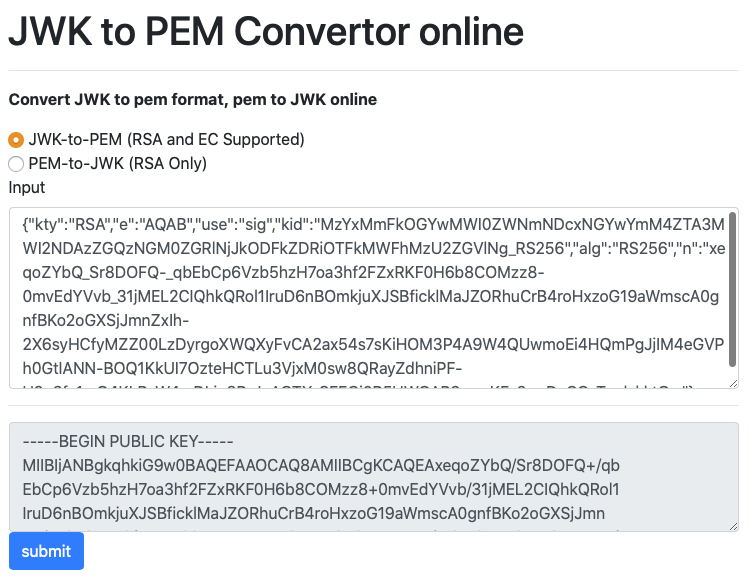
image
Set the OpenId Connect Discovery URL
Will be in the format below. Replace host and port with the correct values for your deployment:
AUTH_DISCOVERY_OIDC_URL=https://ec2.eu-central.compute.amazonaws.com:9443/oauth2/oidcdiscovery/.well-known/openid-configuration