Configure Okta for use with the API Server
Add roles
In Okta roles will be configured using the groups construct.
Go to the groups menu - in the example below both org-admin and
platform-admin roles are already defined 
These groups were simply added via the “Add group” button, just enter
the name and a description 
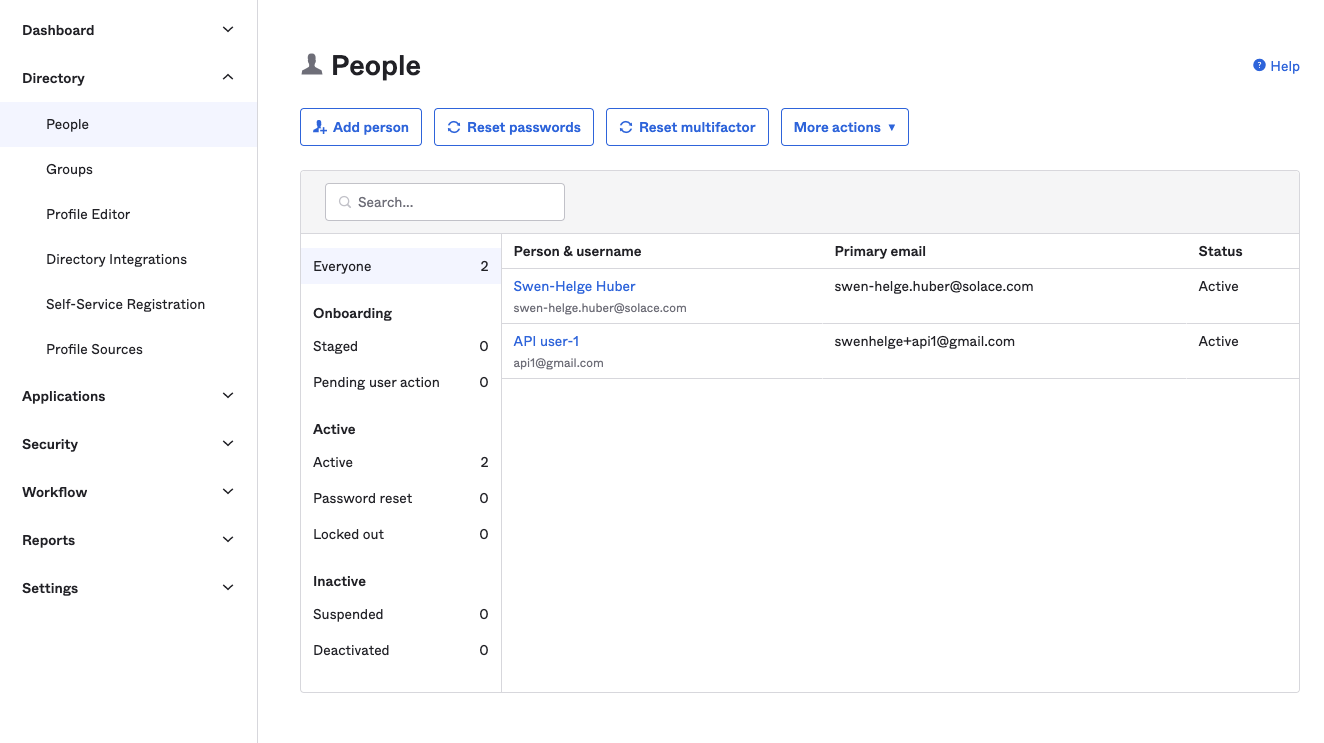
Add user
Users are managed under the “People” menu -
image
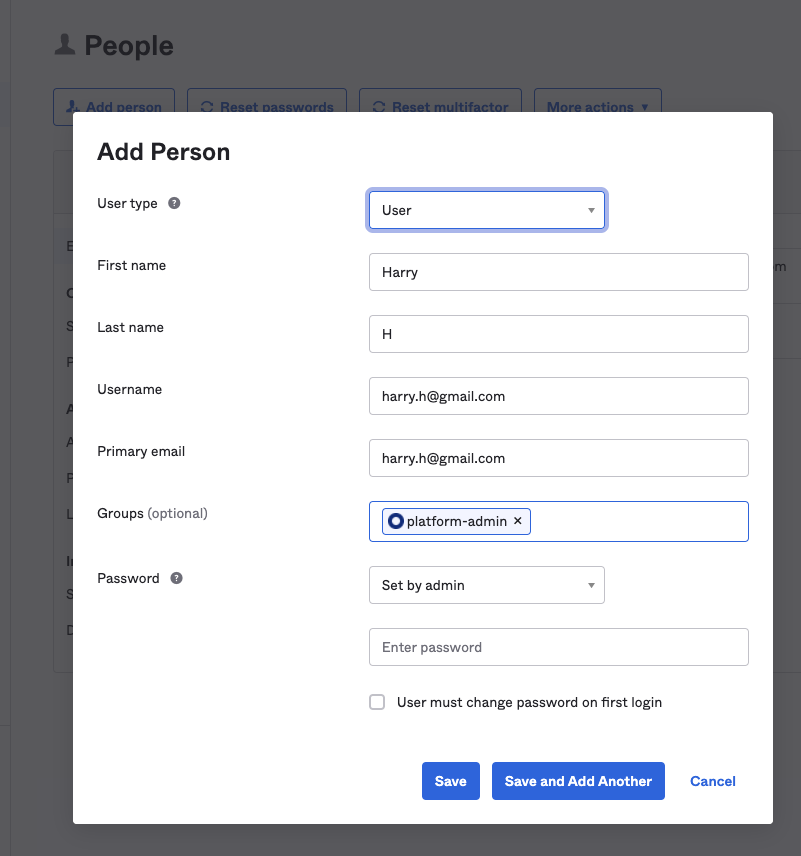
Add a new user. On this screen you can set the appropriate groups - which map to roles in the API server. (Note: for testing purposes it may best to preset the password as shown in the screenshot)
image
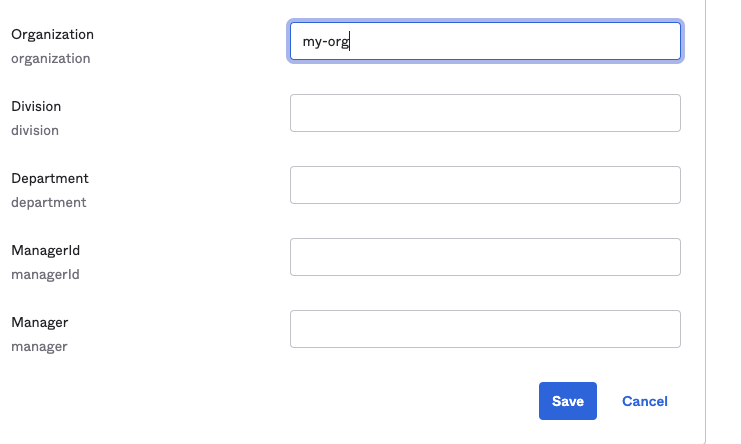
Add organizations
Organizations are captured in the organization attribute of the user
profile. Edit the user you just created (here - Harry H) 

image
Then switch to the “Profile” tab and hit “Edit”, scroll down to the
organization attribute and enter the organizations the user shall be
part of. The API server expects a list separated by space characters.
image
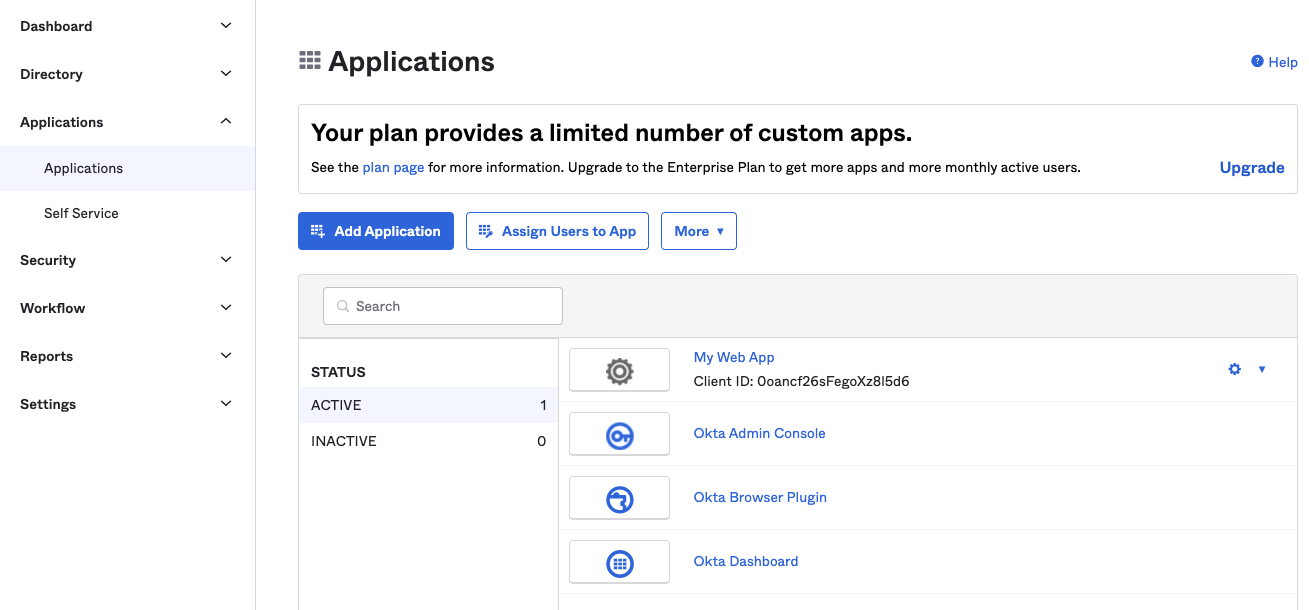
Add the application
Now add the API Server application - on the “Applications” menu, click “Add Application”
image
On the “Add Application” screen hit the “New Application” button. The type of the new application should be “Web” and the sign-on method “OpenId Connect”
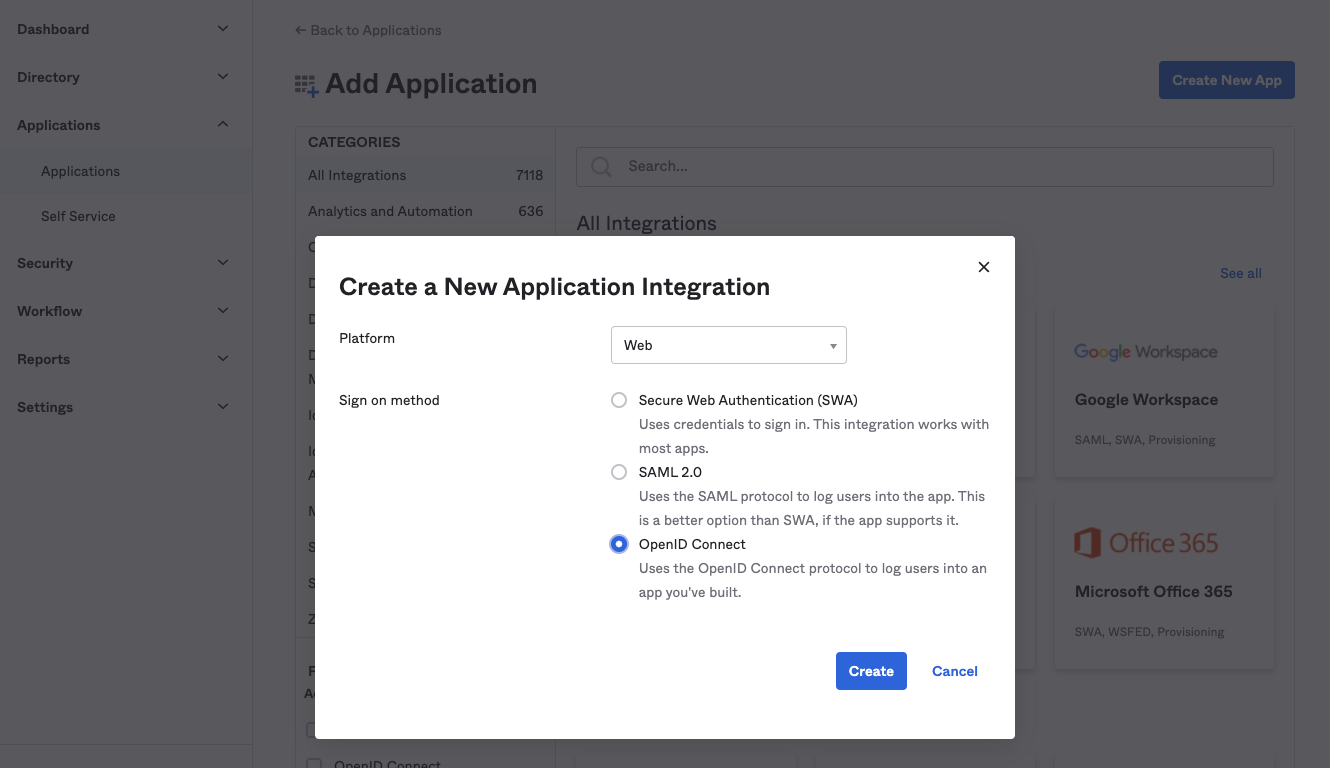
image
Navigate to the new app then scroll down to “General Settings” and click “Edit”. Add any callback URLs your app may use for the authorization/token acquisition, then save.


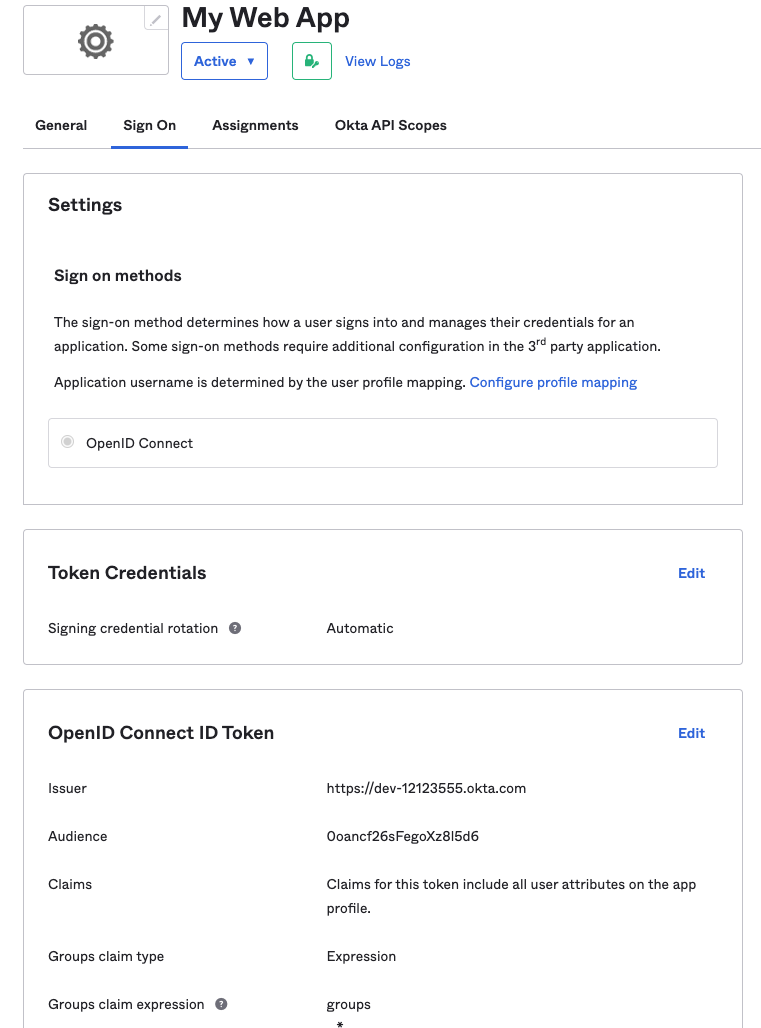
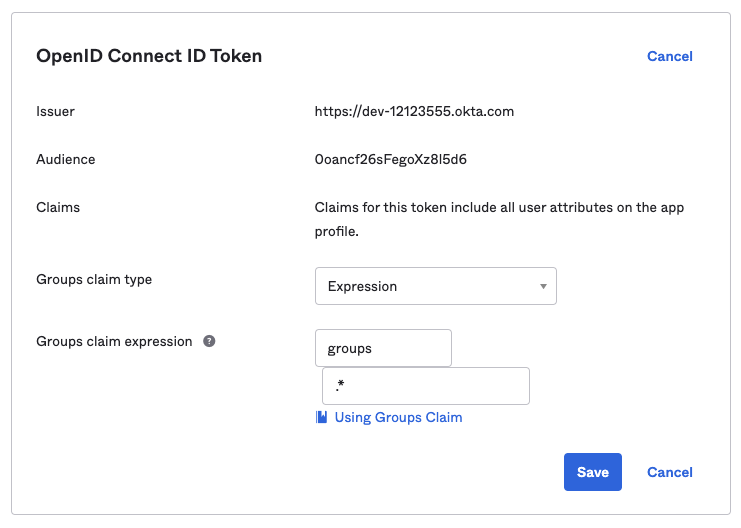
Including Groups (API Server Roles) in the JWT
In your application view switch to the “Sign-On” tab. You need to
configure the “Groups Claim Type” in the “OpenID Connect ID Token”
section. Scroll to this section, then hit “edit” and change the “Groups
Claim Type”. Use groups as the claim name and .* as the group
matching expression.
image
image
Include groups and organization claim in JWT - Configure Authorization Server
Navigate to “Security” -> “API”.

image
You can either add an additional Authorization Server” or reconfigure the “default” server.
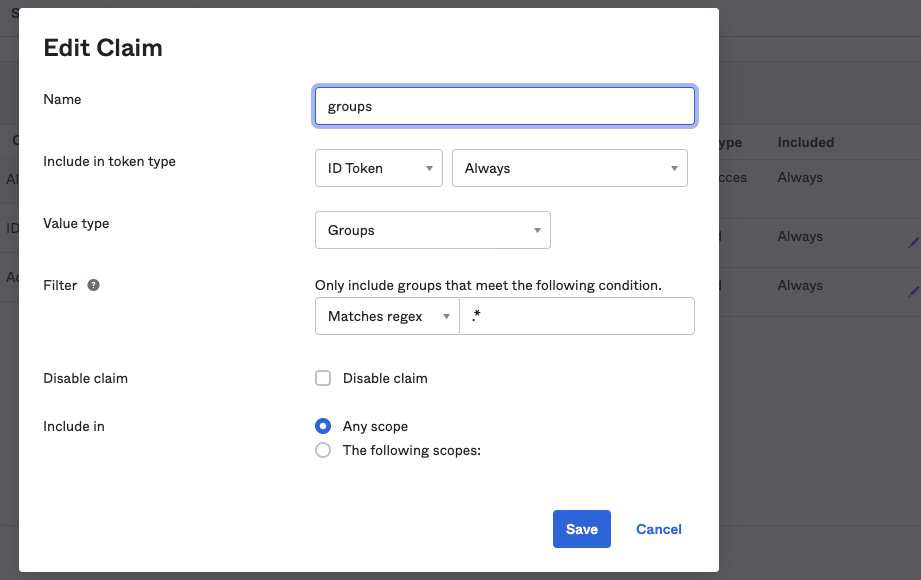
Below are the modified “Claims” for the default server, drill down onto the server then switch to the “Claims” tab.
The “organization” and “groups” claims are already set up, find the settings for each below.
Note: * Claims are included in the “Id Token”. To also include in the access token you need to duplicate the claim and choose “Access Token” in the “Include in token type” section. * “Include In” is set to always so these attributes are returned in response to any authorization/token acquisition regardless of the scopes requested.

image

image
image
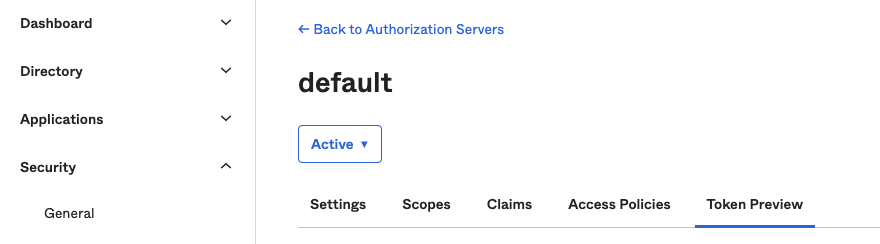
Preview JWT
In the “Authorization Server” view under “Security” -> “API” there is a “Token Preview” tab
image
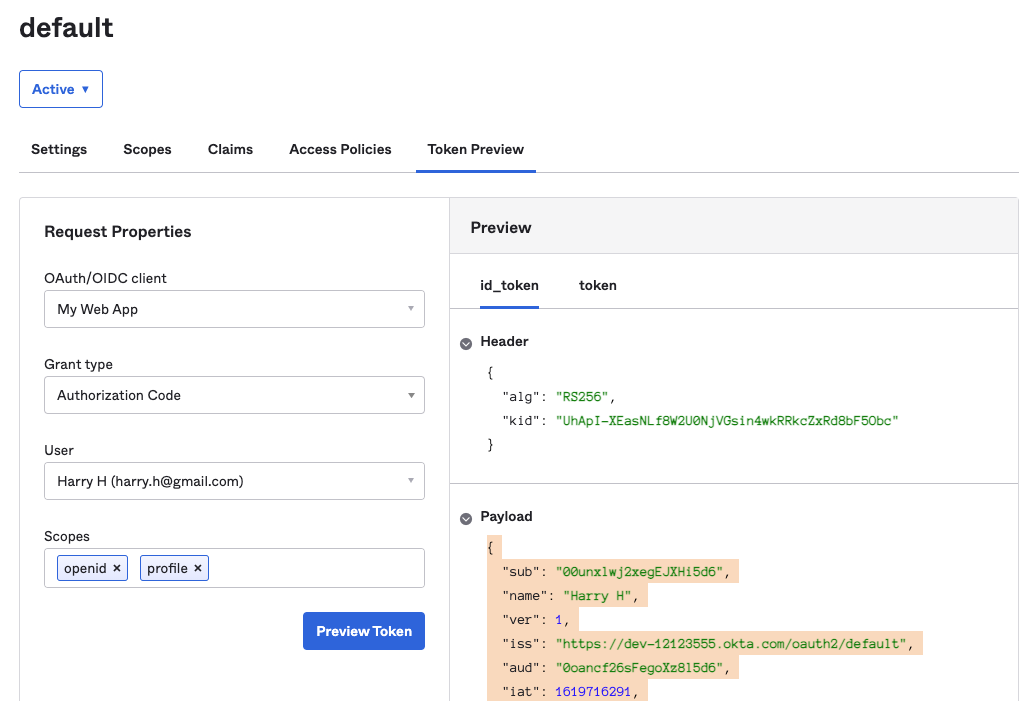
Fill in a request providing your application name, user name, scopes “openid” and “profile”, use “Authorization Code” as “Grant Type”. Then preview the token:
image
Example payload section of the JWT token:
{
  "sub": "00unxlwj2xegEJXHi5d6",
  "name": "Harry H",
  "ver": 1,
  "iss": "https://dev-12123555.okta.com/oauth2/default",
  "aud": "0oancf26sFegoXz8l5d6",
  "iat": 1619716591,
  "exp": 1619720191,
  "jti": "ID.F1O8iRDQoFWpc1S33yL0oKQkEgca7fldq99F7An-pXA",
  "amr": [
    "pwd"
  ],
  "idp": "00oncdc53KoJbUvfN5d6",
  "nonce": "nonce",
  "preferred_username": "harry.h@gmail.com",
  "auth_time": 1000,
  "at_hash": "preview_at_hash",
  "organizations": "my-org",
  "groups": [
    "platform-admin"
  ]
}
Configure the API Server
Properties for claim and username extraction:
AUTH_EXTRACTION_USER_PRINCIPAL=$.preferred_username
Will evaluate to “harry.h@gmail.com” given the JWT example above.
AUTH_EXTRACTION_ORGS=$.organizations
Will evaluate to
my-org
AUTH_EXTRACTION_ROLES=$.groups
Will evaluate to
[
    "platform-admin"
  ]
Properties for JWT verification
AUTH_VERIFICATION_AUD= 0oancf26sFegoXz8l5d6
Must match the aud property in the JWT token - see example above
AUTH_VERIFICATION_ISSUER=https://dev-12123555.okta.com/oauth2/default
URL containing the OKTA account (dev-12123555) and authorization server (default) that issued the token
AUTH_VERIFICATION_KEY=/home/admin/platform-api-tmp/okta.pem
You can obtain the public key / cert via Okta’s JWKS endpoint and you
then need to convert the key to a PEM format. The JWKS URL is at
https://[account name].okta.com/oauth2/[authorization server name]/v1/keys.
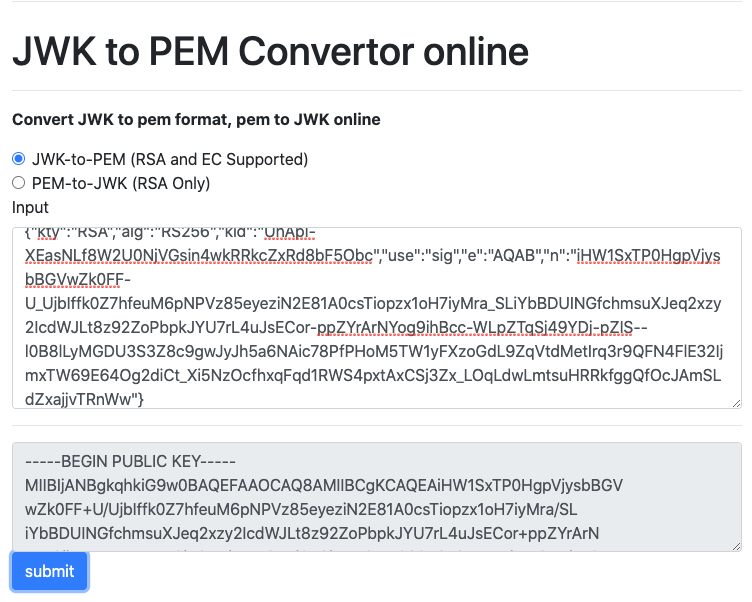
Copy the key element of the payload as below

image
To convert JWKS to PEM you can for example use this web site -
8gwifidotorg/jwkconvertfunctions.jsp. Paste the JWK key and hit
submit, then copy the resulting public key and save it to the local file
system - in the example above it was saved to
/home/admin/platform-api-tmp/wso2-key.pem
image
Set the OpenId Connect Discovery URL
Will be in the format below. Replace account name and
authorization server name with the correct values for your
deployment:
AUTH_DISCOVERY_OIDC_URL=https://[account name].okta.com/oauth2/[authorization server name]/.well-known/openid-configuration